Hey!
For this blog post we decided it would be nice to put the spotlight on our Level Designer, Wilson Almeida. We originally told him to write something simple and direct about puzzle design, little did we know that he would instead take a massive deep dive into his owns subconscious and analyze the entire microcosms. Oh well, nothing that a few years of therapy won't solve!
------------------------------------------------------------------------------------------------
Puzzle Design
With Wilson Almeida
Introduction
My name is Wilson Almeida and I am working on the puzzle and level design for Out of Line.
When I was approached to do this blog post I decided to write about my design process instead of the puzzles themselves. This way you can take a peek into how puzzles are made, spoiler free.
The current design challenge I’m facing is creating puzzles using a new mechanic in the game, it’s always exciting to play with new toys but in this case it’s particularly appealing because of its physics-based nature. This type of mechanic lends itself to a wider range of possibilities and situations, some unpredictable and others chaotic, the good kind.
It’s been a joy to explore and come up with new puzzles using it, I hope you find the explanation of my process equally entertaining and useful.
Puzzle Design in 5 Steps
Before beginning, what I’m about to share is just the way I do things and in no way advocating to be the only way or the correct one. This can depend on the designer, type of project and the people you work with.
This is still a work in progress as I’ve tried several approaches while designing Out of Line, at the moment this seems to be working and thanks to this blog post I have the opportunity to put it all in words. While writing this, I strived to keep the process as generic as possible for those of you making games, in case you might find something useful that you want to try or adapt into your own project and design process (super cool if you do this, please let me know).
The process assumes you already have a working version of your mechanic inside the game’s editor and a previously built layout of the level you are designing puzzles for, otherwise the approach would be different.
My approach encompasses 5 steps, the idea is to go from having loose mechanics and no puzzles to a coherent group of puzzles in a level section.
Here are the steps:
• Step 1 - Create a Framework
• Step 2 - Mechanic Exploration
• Step 3 - Sketch Puzzles & Interactions
• Step 4 - From Concept to Playable
• Step 5 - Level Integration
Let’s see them in more detail.
Step 1 - Create a Framework
A framework in this context is simply a set of rules to abide by when creating puzzles for a given level section. We do this to limit our actions (in a good way) and reduce the clutter of things we don’t need to care about at the moment to focus solely on what’s important.
In practice, we define these rules by looking at the current mechanics/characters/context/level pieces that we are allowed to work with for a given level section of the game. In my case I already know this because before I started designing anything in Out of Line, I sat down with Francisco Santos, the project’s visionary, together with input from the whole team we created an overview of the whole game from start to finish with all the mechanics, story arcs, characters, level sections and layout.
Having this information allows us to greatly simplify work because it reduces the space of possibilities (mechanics, characters, context, level pieces) to a more manageable small subset. Personally, I find it helpful to list these in someplace, a notebook or a whiteboard, before starting the design of the puzzles, it sort of “flushes” the previous framework out and “loads” the new one into my brain.
 |
| Out of Line - Chapters and levels (blurred out, obviously) |
Step 2 - Mechanic Exploration
The objective here is to have a better understanding of what are this new mechanic’s limitations and possibilities. It is crucial to do this before going to the next step, this how I break it down:
• Play with this new mechanic inside the editor:
– Have fun!;
– Try every situation/idea that pops into your head;
– Free yourself from any expectations of getting useful puzzles ideas out of this (you probably get some anyway).
• Combine this mechanic with the old ones:
• Break it, put it under stress;
• Big plus if you can abstract it’s functionality and apply it to other contexts not previously planned, you might discover something new your game can do.
Step 3 - Sketch Puzzles & Interactions
Now that we have a good grasp of what its actually possible and allowed to do inside the game with this new mechanic, in combination with the others, we are able to sketch puzzle situations in bulk.
The goal is to create several puzzle storyboards that are ready to be implemented inside the game, this helps to keep work flowing in an attempt to avoid “designer’s block” or the fruitless pursuit of the perfect idea for a puzzle. Even if you end up cutting more than half of those implemented ideas, that is to be expected, what matters is the valuable body of work that you end up with, that can be used by combining it in different ways. The following breakdown hopefully explains how this can be achieved:
• Create storyboarded puzzle/interactions with small numbered vignettes:
– This numbered vignettes can later be used as the number of puzzle steps;
• Try to think of small interesting interactions:
– It’s faster do this (at least for me);
– More variety;
– Easy to avoid getting into an endless loop of doubt and self pity.
• Avoid going for complex intricate designs from the onset:
– You waste more time;
– Less variety;
– Harder to get it right (for me at least) - usually due to too many variables at one time;
– Easy to get trapped and burn yourself out (as in mentally exhausted).
• Connect the smaller interactions to create puzzles:
– How many ways can you connect them?:
* Switch them around;
* Is there a theme?;
* Think of a name for it;
* Iterate;
* Try to remove a mechanic of an already established puzzle and see what happens;
* I can’t possibly enumerate all of the options you can try, I think you can get the picture.
• Time saving with fast and cheap iteration - I use pen and paper or markers and whiteboard (I prefer to work standing up at this stage).
• Less emotional attachment to these ideas - easier to part ways with them, it’s just ink on a paper.
• Avoid lingering on details - less distractions because you’re not using any software or computer.
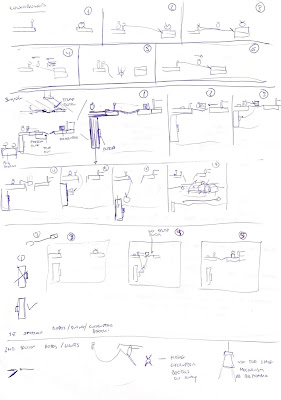
 |
| Wilson asked us to use this sketch from some kid in kindergarten here... |
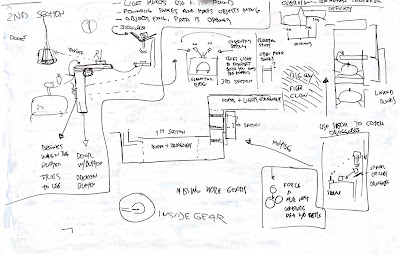
 |
| Again, he asked to use another drawing from some kid, this time from the 2nd grade |
Step 4 - From Concept to Playable
This step is about putting together everything you planned and updating your knowledge about what you discovered in step 2 (how the mechanic behaves in-game). For the most part I build batches of 3 to 4 puzzles that are somewhat linked together and do a quick evaluation by playing it in-game, before doing it again with another batch until I’m out of sketches. Here’s how I “cook” them:
• Build the puzzles inside the editor:
– Don’t judge anything yet, just build - as I’ve said before I usually build them in batches that are somewhat linked by their mechanics.
• Play the puzzles:
– Cut the ones that you instantly know aren’t working:
* Maybe you’re pushing the game’s mechanics too far and it doesn’t work;
* Missing some programmer magic to support your idea;
* Sorry it’s just bad :( - it worked better on paper.
• Save the ones that work and go to the next step.
 |
| A puzzle with the rope mechanic in "greybox" form with a zoomed out camera for development purposes |
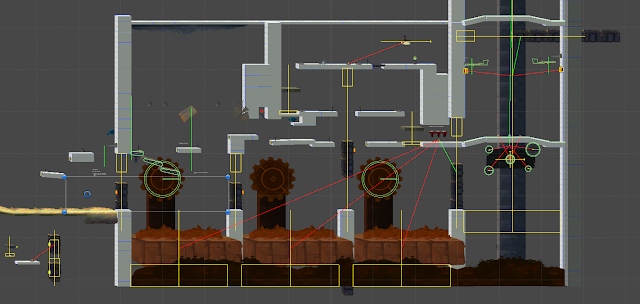
 |
| A more complex take and usage of some basic elements of the game (still zoomed out camera) |
Step 5 - Level Integration
Finally we have ourselves some potentially cool puzzles, but we are far from over because we weren’t explicitly thinking about difficulty or complexity, at least consciously. This next step not only tries to take care of that but it does so according to the level’s context (available mechanics and level pieces). Remember that we already have an overview and a rough layout of the level, as explained in step 1.
You most likely have to go back and forth between step 3 and step 5 more than one time before you’re satisfied with the results. Regarding the quality of the results, It’s extremely important to adjust expectations of what constitutes a designed puzzle in relation to the phase of the project you’re currently at (alpha, beta, etc). With that said, the following breakdown should still be the same for the most part:
• Look at puzzles and their complexity:
– Number of steps to solve;
– Number of moving parts the player has to keep track;
– Size:
* Does it span across several “rooms” or is it self contained in a single area that the game camera can see?;
* This can influence complexity because the player has to remember the puzzle’s state.
– Mechanics used.
• Group them by type of mechanics they’re using.
• Within those newly formed groups:
– Arrange the puzzles by order of complexity;
– Identify missing logical steps;
– Plan to fill in this logical steps by going back to step 3 and sketch more puzzle situations.
• Lay them out within the level design (previously defined).
 |
| One of Out of Line's puzzles super zoomed out ready to receive final art. Cool! |
This was the last step on this 5 step design process but you’re probably asking about playtesting, where is it?
Although there is some testing included in the process, solely by the designer (or a team member or two), we know how extremely valuable it is to do extensive play testing with people from outside the team. For this blog entry I wanted to focus on the creation aspect of puzzle design, maybe I can come back in a future blog entry to talk about testing, who knows. . .
Goodbye
That is all from me, hope you enjoyed the read and found it interesting!
Feel free to comment and share your own process, I’m always down to discuss game design :)
---------------------------------------------------------------------------------------------
...ufff. Thank you Wilson!
So, did you get all that? We hope you did.
Also, let us know how much you love this type of deep techy blogpost so we can convince some more team members to try it.
So long, King Kong.


